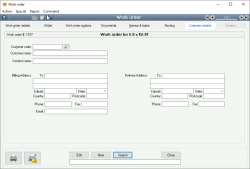
Work order
Work orders are the way you manufacture new kit Items. A work order, when complete, takes all of the component Items of the specified kit, removes them from the nominated warehouse and creates a given quantity of new kit items (having the same total cost as its components), placing them into the nominated warehouse.
Before a work order is completed, it must pass through the following states:
- Committed
- The work order is committed, indicating that components of the work order have been reserved for use by the work order, but nothing has been built yet and no components have been removed from stock. The On work order quantity for this item has been increased by the quantity committed of the work order
- Started
- Manufacturing of the work order has begun. The required component parts have been removed from stock and their value has been accounted for in the kit’s Work in Progress account. All required components need not be removed from stock at the same time. Instead, components can be removed from stock as they become available. A work order cannot be moved to the finished stage however until all required components have been removed from stock
- Finished
- The kit has been manufactured and the work order is finished once the quantity finished equals the quantity requested. The appropriate quantity of new kit items have been added to stock and their value has been removed from the Work in Progress account.
- A work order can be prevented from being completed if the System preference Do not allow Work orders to be completed if they are linked to active timesheet entries has been set, and there is an active timesheet entry.
While a work order always passes through all three states, once a work order has been entered it can be assigned as Finished in a single operation, stepping through the preceding two phases automatically.
The method of forwarding kits through the phases of a work order is to use the Work order action form. This enables a user to specify that a certain quantity of the requested kit items have moved from one state to another. For example, you may elect to start building 5 items of a work order that has specified that 50 items should be built.
A work order can include a Kit change list, which is a list of component items that are to be added or removed from the usual work order kit list.
- Separate dates can be specified for each action conducted on a work order
- Any version of any kit can be manufactured
- Multiple quantities of a kit can be built
- Partial starts can be performed on work orders meaning that a work order can be moved to the started phase without all required components parts being in stock
- All work order actions are recorded and can involve partial quantities
- Work order actions can be performed by any user with appropriate permissions
- Work order actions can be removed (subject to access rights)
- Work order actions can be performed on any date
- Every work order displays complete details of every action that has been performed for that work order
- Requested quantity can be modified after building has begun
- The stocking warehouse and component warehouse can be different
- A work order can be linked to a Job or a Sales order
- The list of components for a work order can be customised just for that work order
- A work order can be requested by one user and assigned to be built by a different user
- Only users with administrator permissions can set the status of a work order
- Pop up notifications available for Items
Module: Manufacturing
Category: Work orders
Activation: Main > Manufacturing > Work order
Form style: Multiple instance, WYSIWYS, SODA
Special actions available for users with Administrator permissions:
- Delete all Work order actions tab associated with the work order, including those performed by other users.
- Delete a work order when Work order actions tab exist for that order.
- Change the User ID of the Entered by field of memos.
- Edit memos entered by other users.
- A work order cannot be deleted if the quantity started is greater than zero unless the current user has Admin permissions for work orders
- A work order cannot be deleted if any of its transaction dates are outside the range of the Extended financial year or before the Journal lock date
- If any quantity has been started for the work order, then neither the date, Kit code, Warehouses, Job, Accounts or Change Component list may be modified
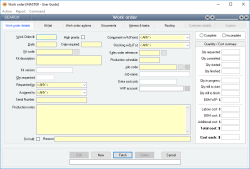
Reference: number, read-only, WYSIWYS
This number uniquely identifies a work order. The Work order # is automatically generated by the system after the first update and cannot be changed for the life of the work order.
If a work order is deleted, its work order # will never be used again for another work order.
Reference: text(30), mandatory, AutoComplete, QuickList, WYSIWYS
This is the item code of the kit that is being built. This must represent a valid kit item code, but you can type the first few letters of the code and activate the QuickList (by clicking on the button or pressing the QuickList Hot Key).
You can select a prior version of the kit by clicking on the Select version button. This is the only way to select a prior version of the kit. If you type the kit code in manually, the current version will always be used.
This Kit code of a work order cannot be changed if the Qty committed for the work order is greater than zero.
Reference: button
This button is used when you want to select a specific version of a kit to manufacture. When clicked, this button displays the Kit versions QuickList from which you can select a kit and version.
Reference: select from list, mandatory, HotEdit, WYSIWYS
This is the User name (not user login ID) of the user that requested the work order. This field is filled in by default with the user name of the current user but can be modified as necessary.
Reference: select from list, mandatory, HotEdit, WYSIWYS
This is the User name (not user login ID) of the user that has been assigned to manufacture the kit. This field is filled in by default with the user name of the current user but can be modified as necessary.
Reference: Text
When this field is filled in, the serial number selection page (on work order finish, not start) will default to one row on the "Selected Serial Numbers" grid box (the box on the right). The single default row will have the quantity set to the quantity the user is attempting to finish. The serial number will be set to the string specified in the new field.
If this field is not filled in from previous versions, serial numbers will behave as normal.
Reference: select from list, mandatory, HotEdit, WYSIWYS
This is the Warehouse from which the component items of the work order are taken to build the new kit items.
This field cannot be changed if the Qty committed for the work order is greater than zero.
Reference: select from list, mandatory, HotEdit, WYSIWYS
This is the Warehouse into which the finished kit Items are placed. This does not have to be the same Warehouse as that from which the kit's components are taken.
This field cannot be changed if the Qty committed for the work order is greater than zero.
Reference: number, QuickList, WYSIWYS
This is the Sales order number for which this work order is being performed. There are no restrictions on what number can be entered here as long as it either represents a valid Sales order number or it is empty.
You can click on the button or press the QuickList Hot Key to display a list of Sales orders.
You can filter work orders by their position in the corresponding Sales order. After inserting the Sales order #, add a dash, then the line number.
"4-3" means Sales order 4, line position 3.
Last edit 29/01/20
Reference: text(64), AutoComplete, QuickList, WYSIWYS
This is the Job to which the work order relates. The only restrictions placed on which Job code can be put in this field, are that the job is valid and is not closed.
You can click on the button or press the QuickList Hot Key to display a list of Job codes. If no Job code exists, you can press the new job button to create a new Job reference.
When you enter a job for a work order, if that job has a Work in Progress account specified for it, the Work in Progress account will be placed in the Work in Progress account field for the work order.
This field cannot be changed if any Start or Finish actions have been performed for the work order.
Reference: account, mandatory, QuickList
This is the account that is used to put (debit) the total value of all component items of the number of kits that have been Started. When a quantity of the kits is Finished, the corresponding proportion of the value that has been assigned to the Work in Progress account for this work order is removed (credited) and placed into the stock account for the item being built.
The account that is initially used in this depends on the data entered for the work order. If a job has been entered, and that job has an associated Work in Progress account, then this will be the account that is used. In this case, the account cannot be modified. If no job has been specified, or the job that has been specified does not have an associated Work in Progress account, the account for the item being built will be used and can be changed as required.
This field cannot be changed if the Qty committed for the work order is greater than zero.
Reference: account, QuickList, WYSIWYS
This field is not mandatory. If it is filled in with a Pay item, that Pay item will be automatically filled into the Pay item column on the Timesheet when the work order is selected. It will also override the default Pay item for the User. If there is no selected Overriding Pay item, the user's default Pay item will be used. The Pay item can always be overridden in either case, but this allows efficiency in making it automatic.
Reference: memo, expandable, WYSIWYS
This is free text that is used as additional information about the work order. When a kit is selected for the work order, any production notes stored in the kit information are filled into the field.
Reference: text(255), expandable, WYSIWYS
This is free text that is used as additional information about the work order. When a kit is selected for the work order, any production notes stored in the kit information are filled into the field.
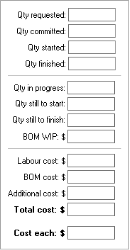
Reference: quantity, Read-only
This is the total number of kits that you want to build with this work order. This quantity can be modified after you have started the work order, but it cannot be changed to be less than the total quantity you have started. Once you have finished a work order, the total cost of all materials, labour and overheads are added to the quantity of produce finished and therefore the quantity requested can no longer be changed. At this point the work order is considered complete. The only way to modify the “Qty requested” is to remove the last Finish action.
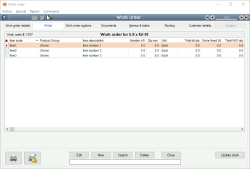
This tab contains a list of component Items that comprise the kit being built. When a kit is first entered, the list is filled with the component items for the kit. Modifications can then be made to this list, with current item quantities being modified, new items added or existing items removed.
The kit list contains the following fields:
Reference: text(30), AutoComplete, QuickList
This is the item code of the item that is to be included in the kit for this particular work order. This must represent a valid item code, but you can type the first few letters of the code and activate the QuickList by pressing the QuickList Hot Key.
This field cannot be changed if the Qty finished for the work order is greater than zero.
Reference: quantity
This is the quantity of Items to be included in the current work order. The quantity specified here should be the quantity of the item per single kit item.
This field cannot be changed if the Qty finished for the work order is greater than zero.
Reference: quantity
This field is an additional quantity, over and above the Total kit quantity (Number of kits x Qty per kit). This Extra Fixed Qty is consumed when the work order is started. This fixed quantity allows you to use a constant quantity of an item regardless of the quantity of kits being built. For example:
- Add wastage
- You may use (and dispose of) a single paintbrush each time you paint a batch of items, regardless of whether you are painting a quantity of 2 or 20 of the items.
The extra fixed quantity is consumed as soon as:
- The work order has been started or
- If already started; as soon as it is entered into the work order "Extra Fixed Qty" field.
So be careful when you are doing partial builds, because the cost of the extra fixed quantity will be apportioned to the cost of the next quantity of finished items.
For example: Say you are injection moulding plastic buckets that requires x grams of resin per bucket. If, after you make a batch of buckets, you need to purge the remaining resin from the machine which you know weighs 5 kg, then the Extra Fixed Qty of resin on the kit list would be 5 kg (5,000 grams). However, if your work order is to make 1,000 buckets and you perform a partial finish of 100 buckets, then the extra fixed quantity of 5 kg of resin will be apportioned across the first Finished quantity of 100. Each bucket will therefore consume 50 g cost of resin extra. The remaining 900 buckets will not be apportioned any fixed cost.
The reason it works this way is so that you can modify the Extra Fixed Quantity to take into account wastage throughout the process. You can modify this at any point in time to increase it further as more wastage occurs, and this will apportion the additional amount to each subsequent Finish action.
Some examples of how you would use the Extra Finished Quantity are:
- You make food items and some ingredients are not suitable for use. This wastage can be weighed/ counted and added to the Extra Fixed Quantity and the cost will be apportioned to the finished batch.
- You are unable to weigh or count the exact quantity of a component during manufacturing, but you can count it at the end and add it to the Extra Fixed Quantity. You would therefore make your BOM Quantity 0, and the Extra Fixed Quantity the full quantity of components consumed.
- You want to represent exactly one box used to package the result of your work order (e.g. you make a batch of product and use one box at the end).
Last edit: 21/01/21
Reference: quantity
Information is under review for a new version and will be updated soon.
Reference: quantity
Information is under review for a new version and will be updated soon.
Reference: Quantity, Read-only
This is the quantity of kit components that the work order has been unable to consume because of a shortage of stock at the time that the work order Start action was performed.
When you start a work order, Accentis Enterprise will attempt to consume (remove from stock) all of the raw materials listed on your kit list in proportion to the quantity of kit item assemblies you are starting (for example, if your kit list specified 10 x widgets per assembly and you are starting 5 x assemblies, Accentis Enterprise will attempt to remove 50 widgets from stock). If some of those materials don’t exist in stock at the time that you start your work order, Accentis will continue to consume everything that it can, but flag some of the items as having a quantity not yet started (N/S). It means that even though you have started work, you are short some components, so quantity represents the total quantity of the component item that should have been consumed from stock but could not because of a stock shortage at the time.
To consume any kit component items that now are now in stock, you can click the Update stock button. This will immediately attempt to consume any shortages on the list. After this operation, it is possible that you will still be short some or all of the kit component items.
When you attempt to Finish a work order, Accentis Enterprise will again attempt to consume these shortages. If you still don’t have enough in stock to fulfil all of the shortages, you won’t be able to complete the Finish action.
Last edit 28/04/20
Reference: button
Information is under review for a new version and will be updated soon.
Reference: button
Information is under review for a new version and will be updated soon.
Reference: button
Information is under review for a new version and will be updated soon.
Item one-off entry form.
Reference: button
This button refreshes the Kit list. This is useful if you have made changes to the items within the Kit list while the Work order is in progress.
Certain Why can't I FINISH a Work order: Not enough components consumed? will require you to edit the items within the Kit list before you are able to finish the Work order.
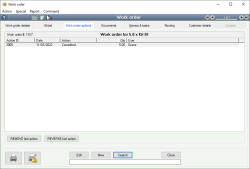
This is the complete list of actions that have taken place for the kit on this work order. The list has the following columns:
- Action ID: The ID automatically assigned to the action. This is the identifier that will be displayed in the Stock and Journal transactions for the work order and in the Audit trail
- Date: The date on which the action was conducted
- Action: The action that was conducted. This will either be Committed, Started or Finished
- Qty: The number of kits corresponding to the action that was performed
- User: The user that completed the action
Reference: button
This button removes the last action that was added for the work order and is the only way you can remove actions for a work order without deleting the work order itself.
When you click on the Remove last action button, you will be asked to confirm the removal of the last action. If you click on Yes, you cannot undo the operation however you can always re-do the same action again.
This option will only be available if the form is in IDLE mode, the Work order is not On hold, there is at least one action in the Work order Action list, and one of the below is true:
- The delete button is not disabled due to the Database rules.
- The User has Administrator permissions for Work order actions.
- The User has Delete permissions for Work order actions, and they created the last action in the Work order actions list.
Reference: button
Information is under review for a new version and will be updated soon.
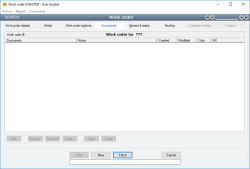
This is a list of all relevant documents associated with the work order. The document list is a list of files names and associated files.
You can specify any type of file that you like, even image or multimedia files.
In Idle mode, if you double-click on one of the list items, the associated document will be opened by Windows providing an appropriate file association exists.
You can Add, Edit or Delete the list of documents by using the buttons at the bottom of the list.
There is no practical limit to the number of document files you can specify for an item.
It is possible to drag /drop multiple documents from a list as well as use the Remove, Copy and Email buttons. When multiple documents are selected, the Change and Open buttons are disabled as these options are only related to individual documents
Last edit: 28/05/20
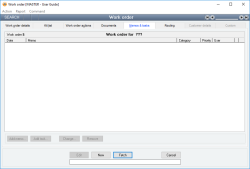
This is a list of all memos that have been made about this work order. A memo can be added / edited at any time. The list of memos for a work order produces a history of how the work order has been modified, used or managed.
To add a new memo, click on the New memo button to display a form that will allow you to enter the date, the user and the memo text.
To edit an existing memo, either click on the Edit memo button or double-click on the list entry.
To delete a memo, click on the Delete memo button.
Memos cannot be edited unless the work order form is in Edit mode.
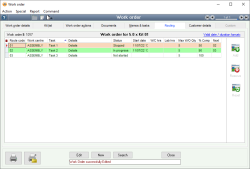
Reference: list
This is the complete list of routes assigned to the kit being built. The list has the following columns:
- Route code
- Text(10)
- Information is under review for a new version and will be updated soon.
- Work centre
- Text(20), AutoComplete, QuickList
- Information is under review for a new version and will be updated soon.
- Task
- Text(30)
- Information is under review for a new version and will be updated soon.
- Details
- Memo
- Information is under review for a new version and will be updated soon.
- Status
- Select from list*
- Information is under review for a new version and will be updated soon.
- Start date
- Date*
- Information is under review for a new version and will be updated soon.
- W/C hrs
- Time*
- Information is under review for a new version and will be updated soon.
- Lab hrs
- Time*
- Information is under review for a new version and will be updated soon.
- Max W/O Qty
- Quantity
- Information is under review for a new version and will be updated soon.
- % Comp
- Quantity
- Information is under review for a new version and will be updated soon.
- Next
- Text(10)
- Information is under review for a new version and will be updated soon.
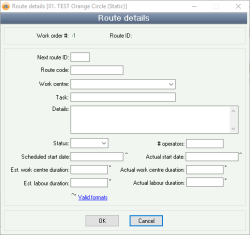
When you double-click a Route line, a new window will open to show Route details.
Reference: Read-only
Information is under review for a new version and will be updated soon.
Reference: Read-only
Information is under review for a new version and will be updated soon.
Reference: Number
Information is under review for a new version and will be updated soon.
Reference: Number
Information is under review for a new version and will be updated soon.
Reference: Select from list, mandatory
Information is under review for a new version and will be updated soon.
Press F3 to access the Quicklist
Reference: Text
This field includes the route details for each specific route ID. If a large amount of information needs to be added to this field, or there is already a large amount of information, it can be accessed by highlighting the field and pressing the F3 hotkey.

In IDLE mode, a large text box will display the field information. You can select the Show options button to search within the information.
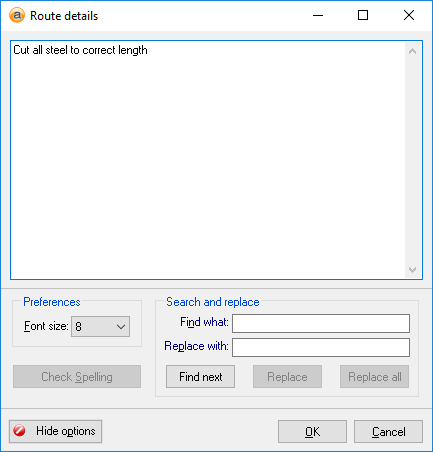
In ADD or EDIT mode, you can modify the information.
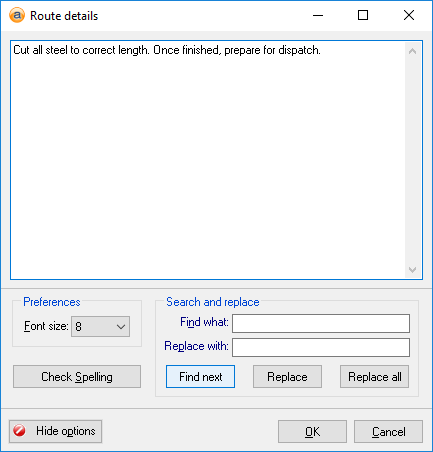
The work order details will update to include the new information.

Last edit 01/10/19
Reference: Select from list, mandatory
Information is under review for a new version and will be updated soon.
Reference: Date
Information is under review for a new version and will be updated soon.
Reference: Time
Information is under review for a new version and will be updated soon.
Reference: Time
Information is under review for a new version and will be updated soon.
Reference: Number
Information is under review for a new version and will be updated soon.
Reference: Date
Information is under review for a new version and will be updated soon.
Reference: Time
Information is under review for a new version and will be updated soon.
Reference: Time
The actual labour duration is a calculated field and is the sum of all timesheet entries that have been recorded against this workorder/route combination. The value is expressed in hours.
Reference: QuickList
Information is under review for a new version and will be updated soon.
Reference: Read-only
Information is under review for a new version and will be updated soon.
Reference: Text(64)
Information is under review for a new version and will be updated soon.
Reference: menu
Information is under review for a new version and will be updated soon.
Reference: menu
Information is under review for a new version and will be updated soon.
Reference: menu
Information is under review for a new version and will be updated soon.
If the product you have finished making is flagged as being "tracked", Accentis Enterprise will want to assign it with a unique serial number so that it can track it for you. To create a serial number, Accentis Enterprise can automatically generate one using the Batch/Serial number format to help speed up the process. You are able to control this format with a number of configuration settings. If you don't specify a format, Accentis Enterprise will set one by default using one of the below formulas.
When Accentis Enterprise generates the number it:
- Uses the Serial number from the Sales Order if the following are set:
- Automatically populate Work order serial numbers from Sales order is selected, and
- Batch/Serial number format is specified. If not...
- Uses the Batch/Serial number format if set. If not...
- Uses the default format: WO#-Qty_Previously_Built_For_WO_+1 (example below)
WO# = Work Order Number = 123
First build Quantity = 25
First batch number would be: 123-1
Second batch number would be: 123-26
Reference: menu
Information is under review for a new version and will be updated soon.
Reference: menu
Information is under review for a new version and will be updated soon.
Reference: menu
Information is under review for a new version and will be updated soon.
In some instances, you may need to adjust a work order. To find out more, see - How to adjust a work order for an item that has been dispatched
Reference: menu
This option will create an invoice using the information provided from the work order. The item code will be directly entered on the invoice.
For this to be enabled:
- The work order must not reference a sales order - if it does, you need to perform a dispatch instead
- The work order must be complete
- The system preference Allow stock items to be manually added to Sales invoices must be set to ON
